
Kite Aerial Photography
My KAP Setup
I would love to have a drone to take some aerial photography but some national parks ban the use of drones (in the UK atleast elsewhere I dont know) and I can attest that they can be quite annoying sounding when you’ve come to enjoy the outdoors and not hear a drone buzzing around, they are also quite expensive so if you somehow lose it or it ends up in the sea, thats potentially £400 down the drain.
When I was looking at drones, I somehow stumbled upon something called Kite Aerial Photography or KAP for short and I thought it was a great alternative to drones, with a drone you are still able to take way better pics easier but for me the pros outweigh the cons.
Here is an example of some photos ive taken using my setup:
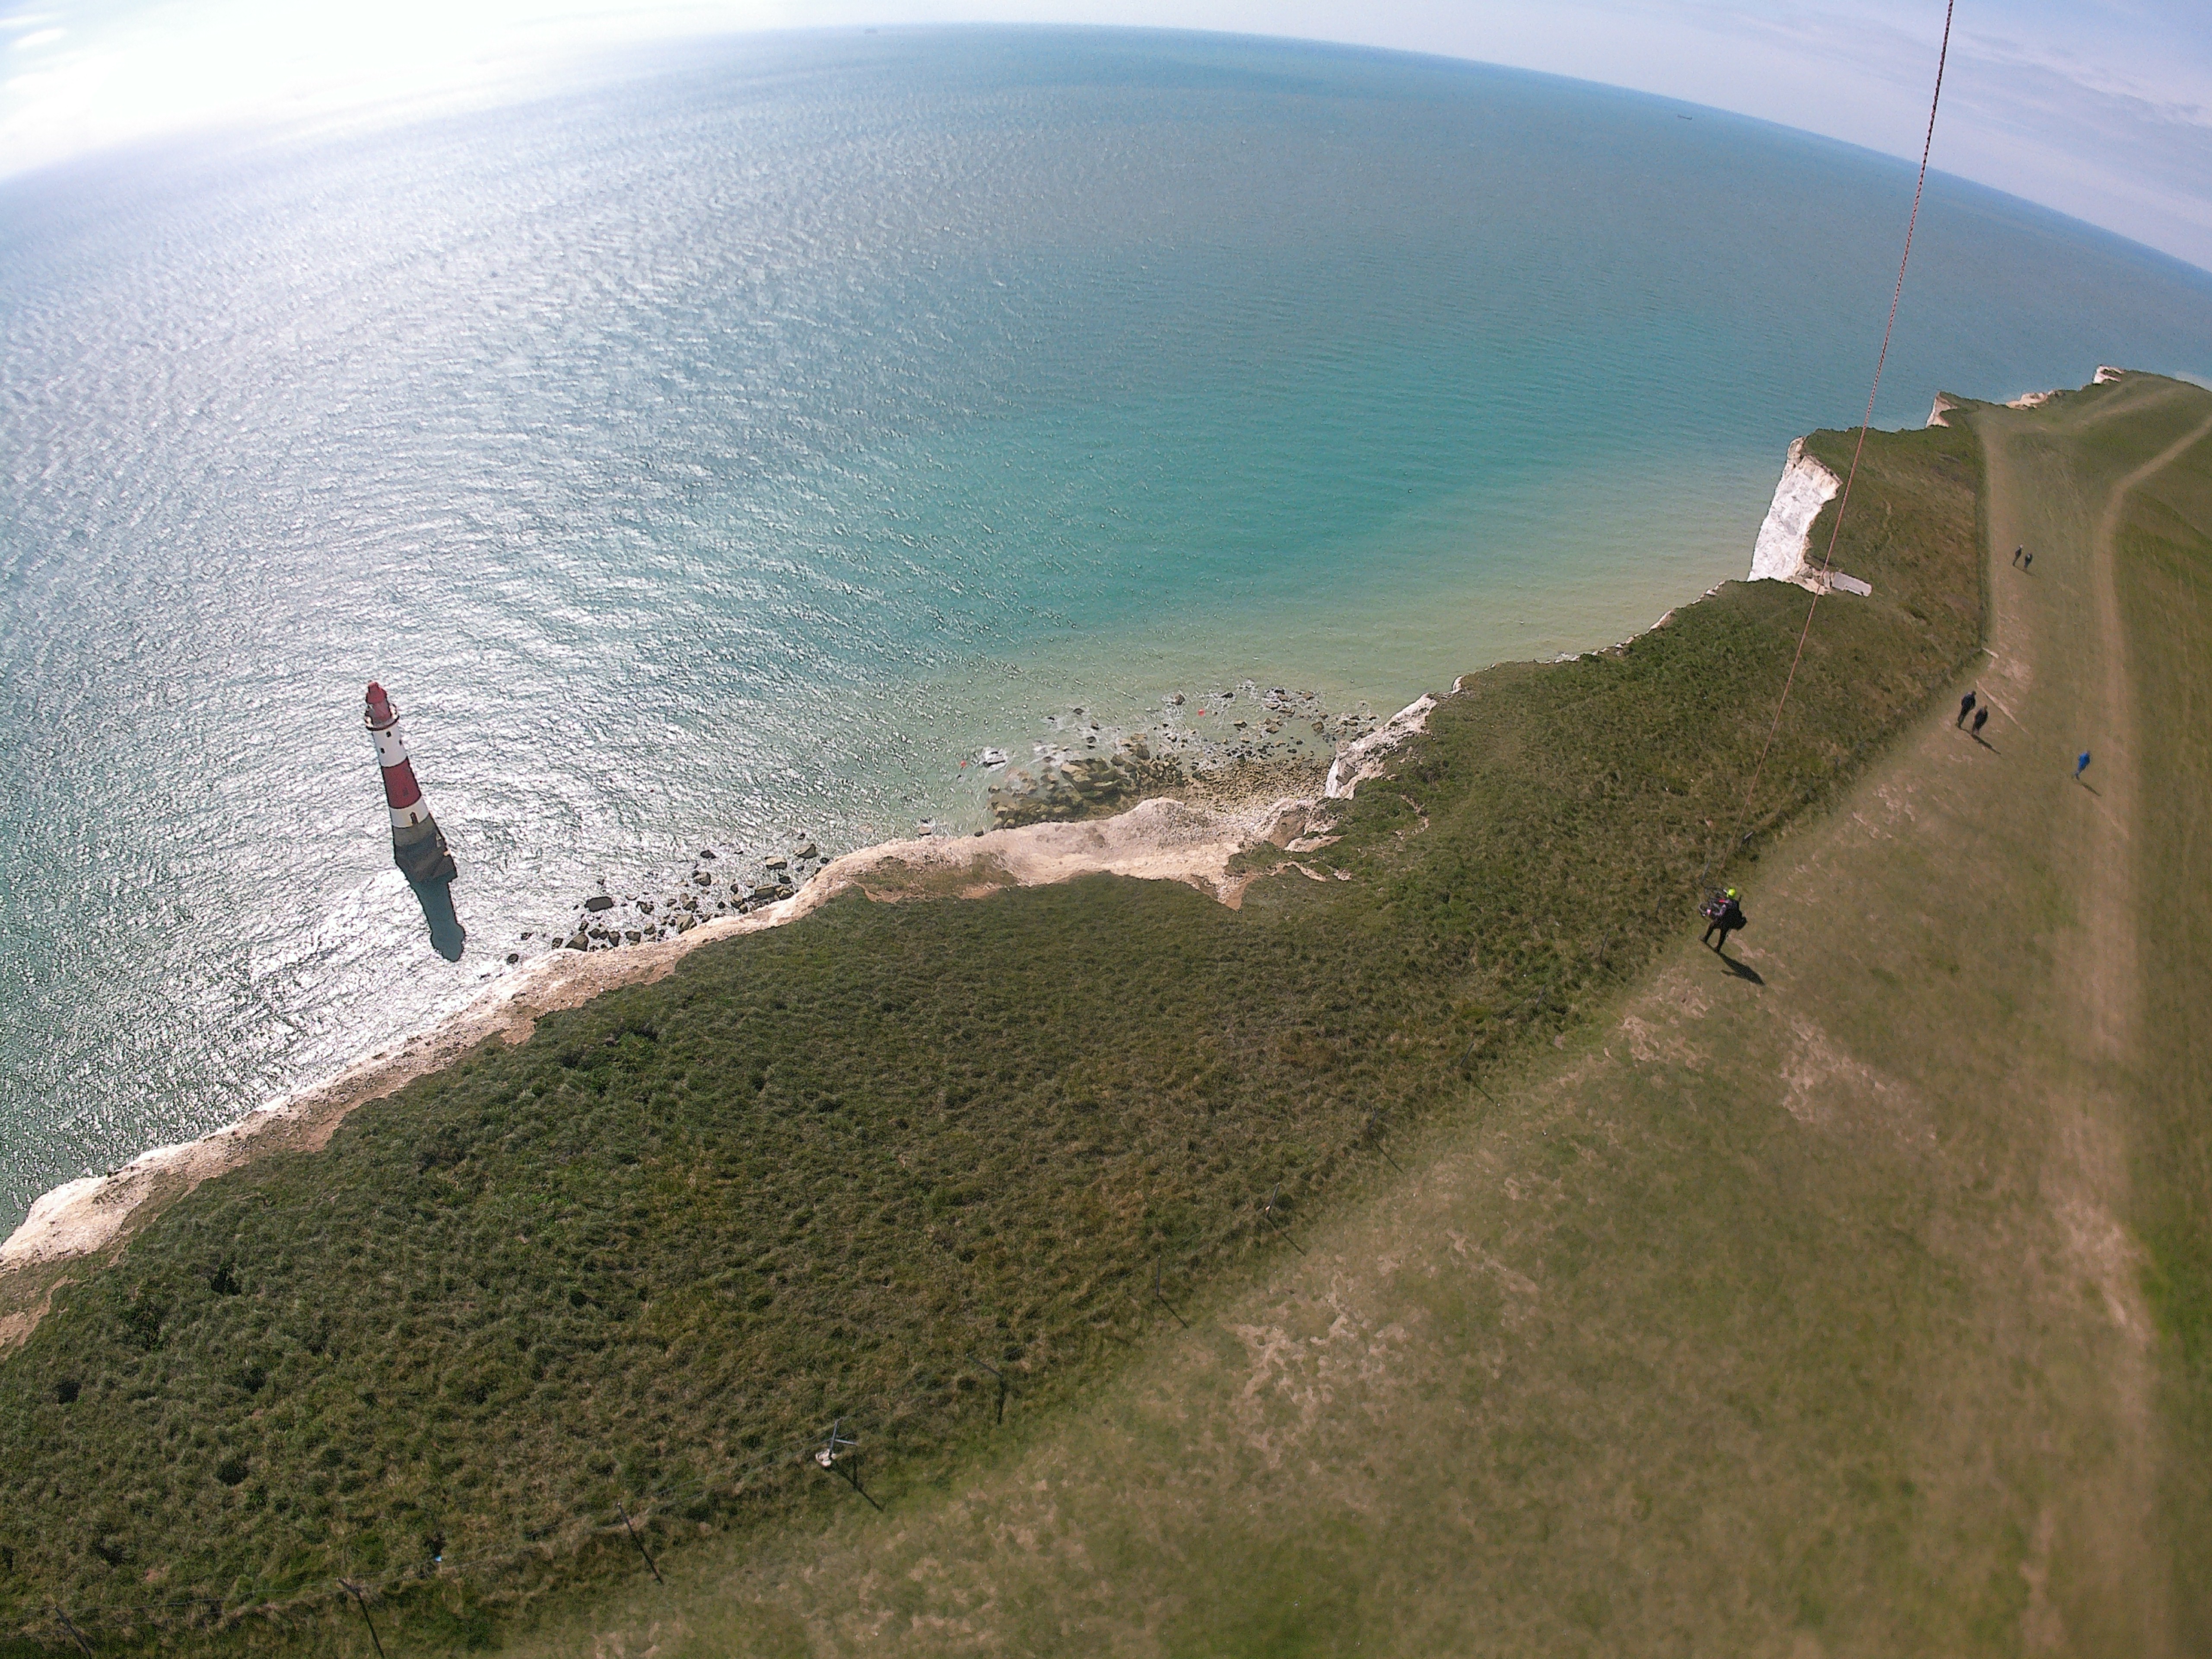
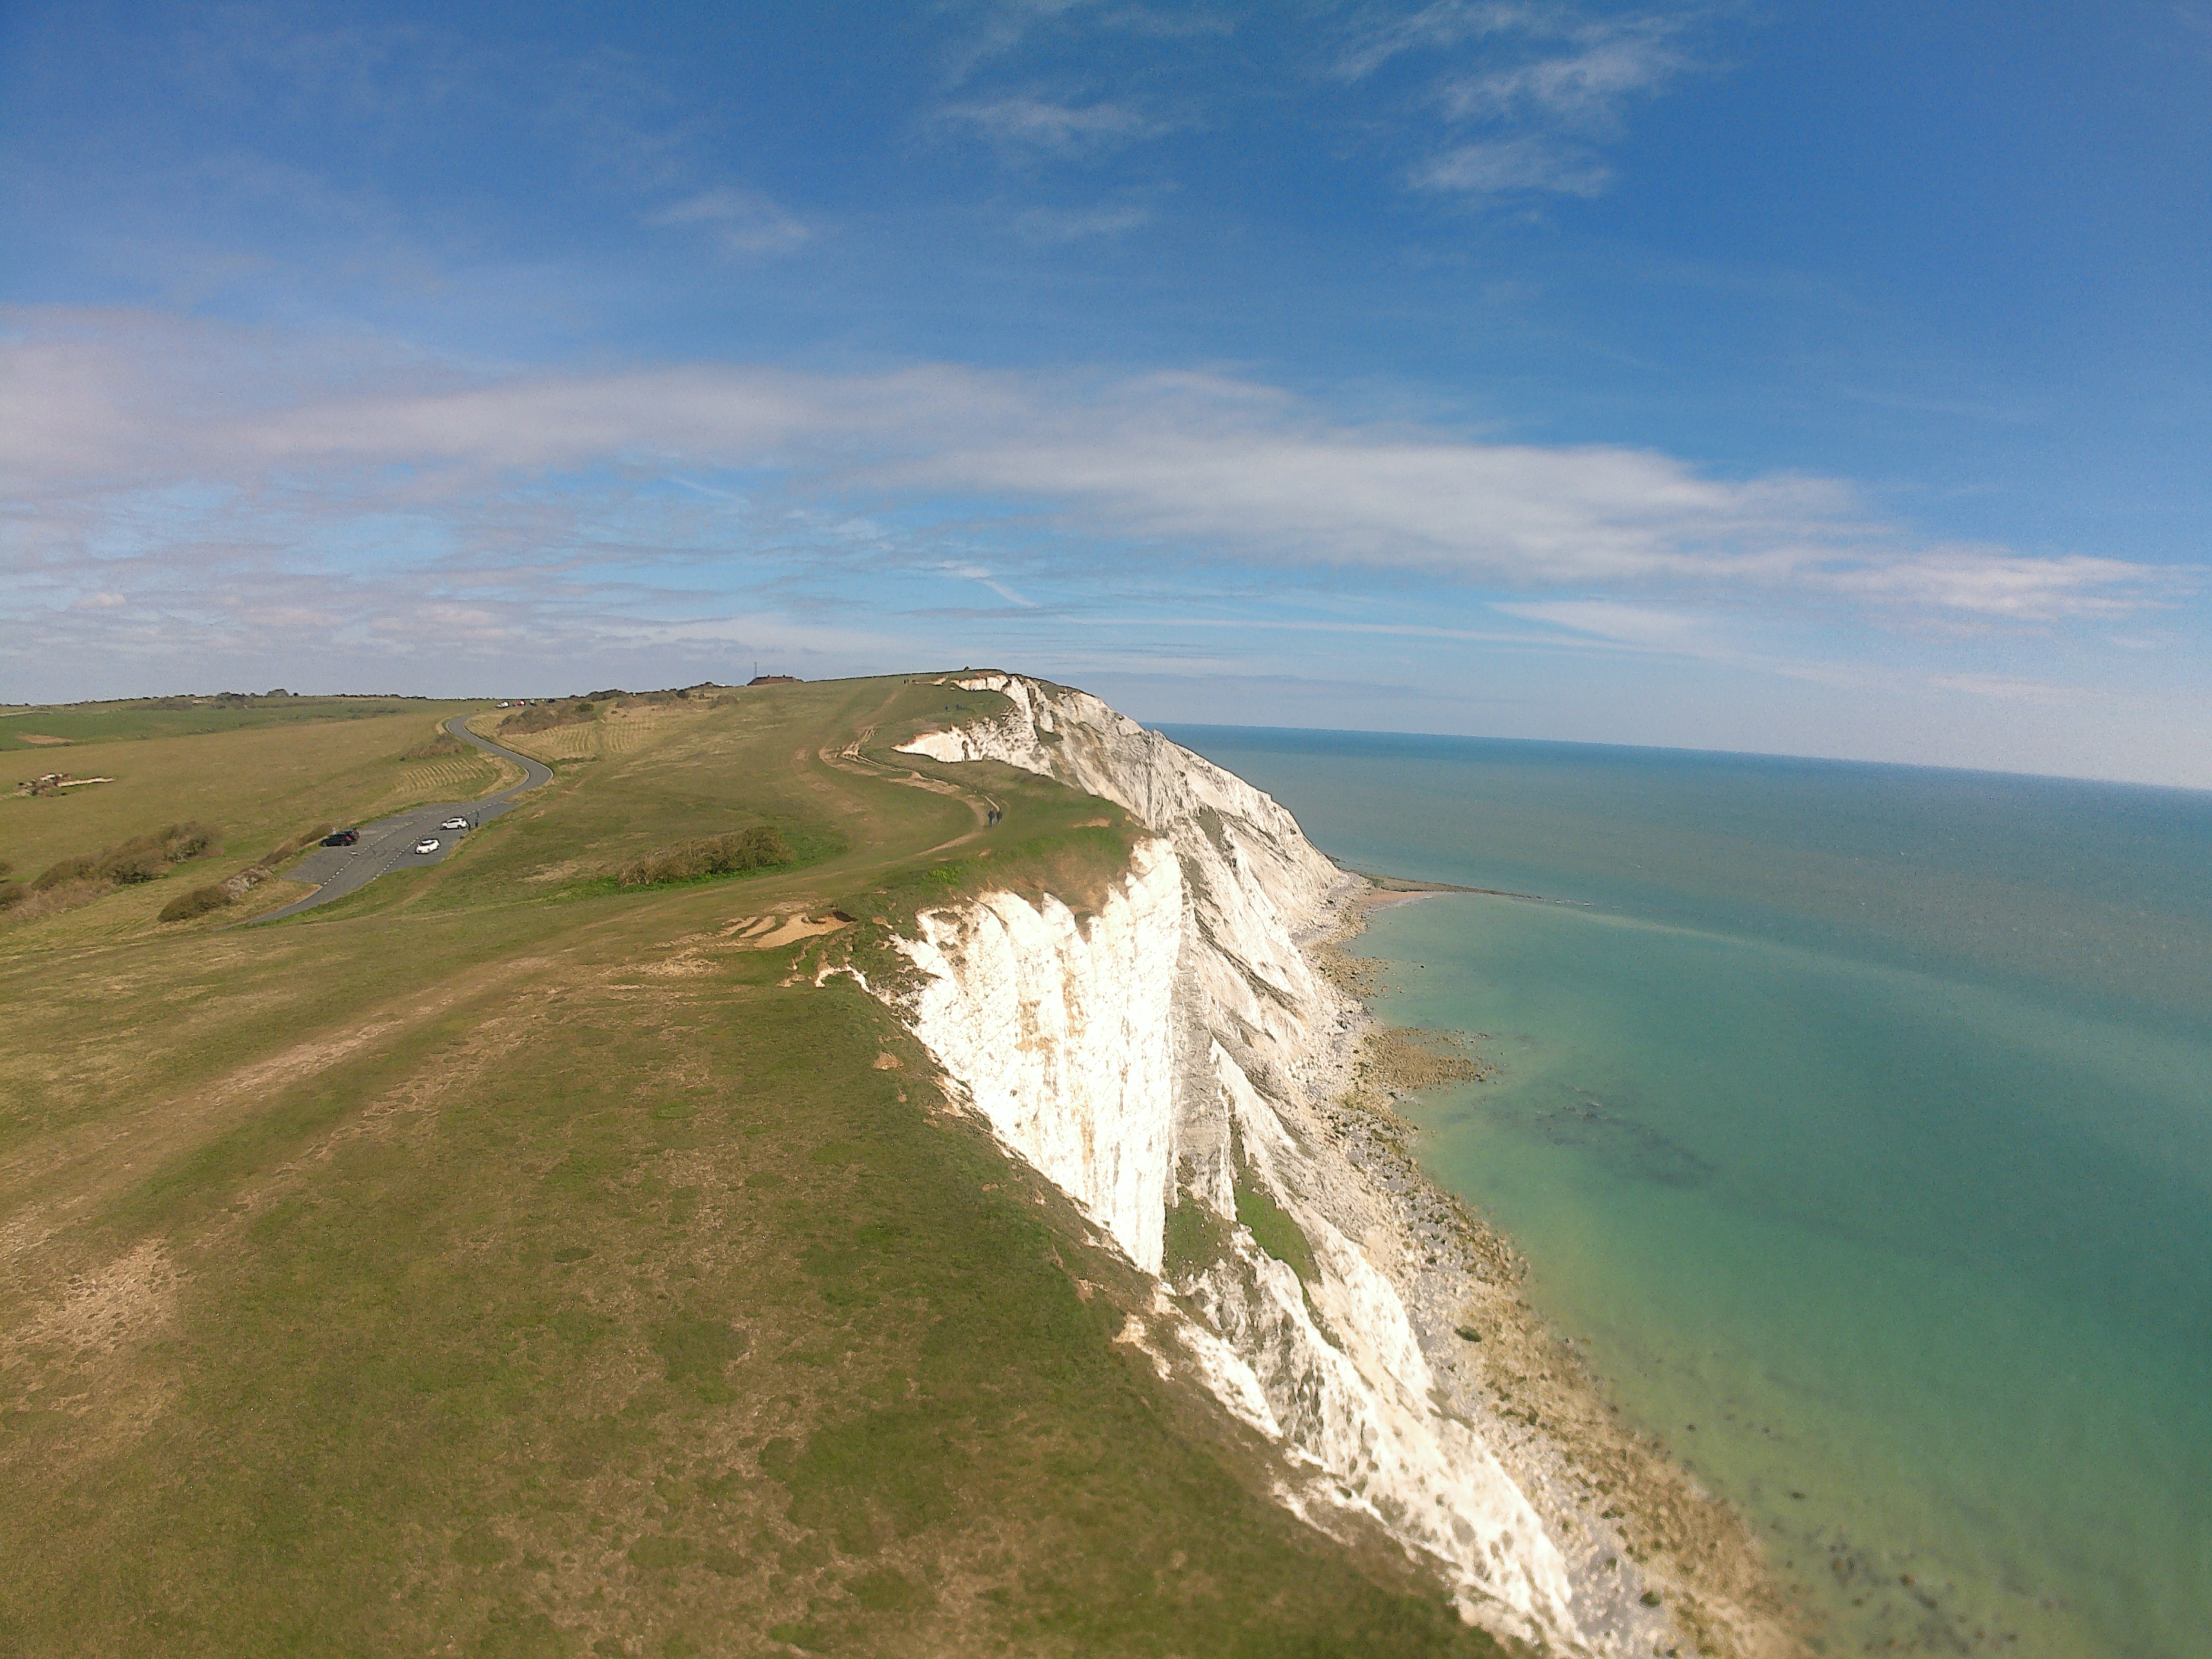
Obviously you would normally try to keep the kite line out of the picture, as in the second picture.
Setup
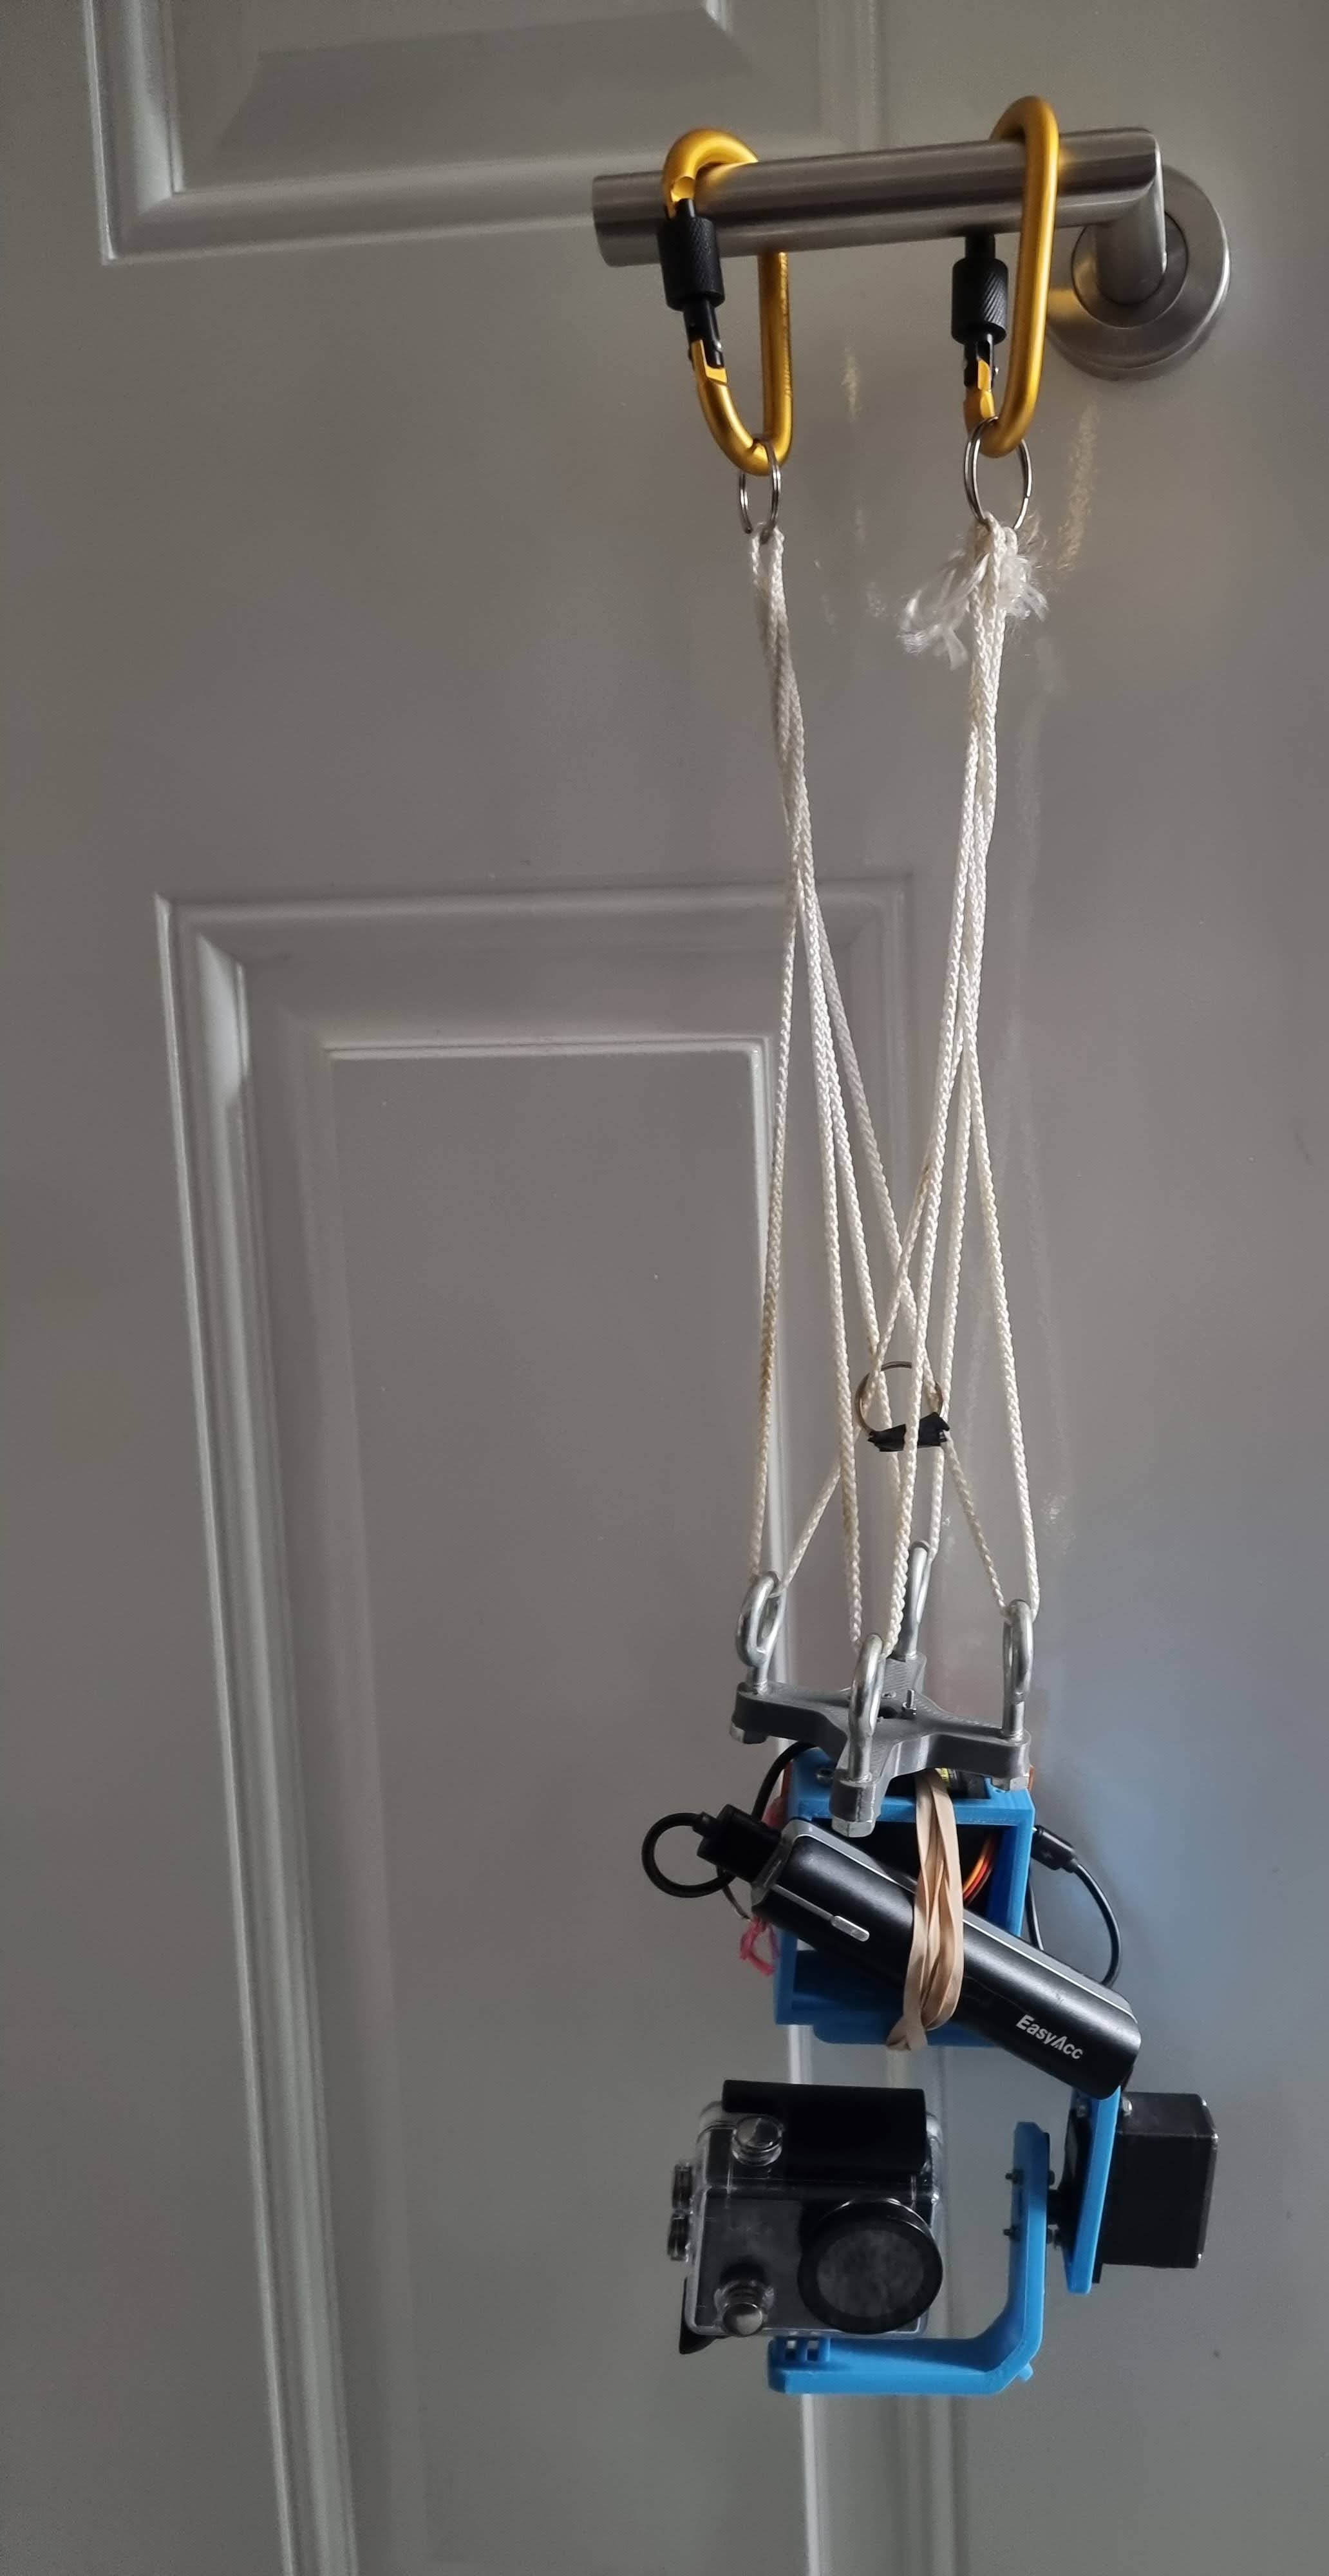
My setup consists of a cheap £30 action camera on a 3D printed gimbal with the commony used Picavet suspension method to keep the camera level.
My gimball setup is a bit of a mix & match between multple 3d designs, First I use the Picavet print from here without the go pro mount bit, then I use my own 360 servo mount underneath it and then attached to that is the roll servo print from here and then attached to that an edited version of the pitch servo print from there.
I used the same servo linked in the how to mechanics article but 2 instead of 3 and one continuous and one 180°.
I will put all files (including the code ran on the ESP) here.
I use this kite and attach the rig to the line after letting it out a bit.
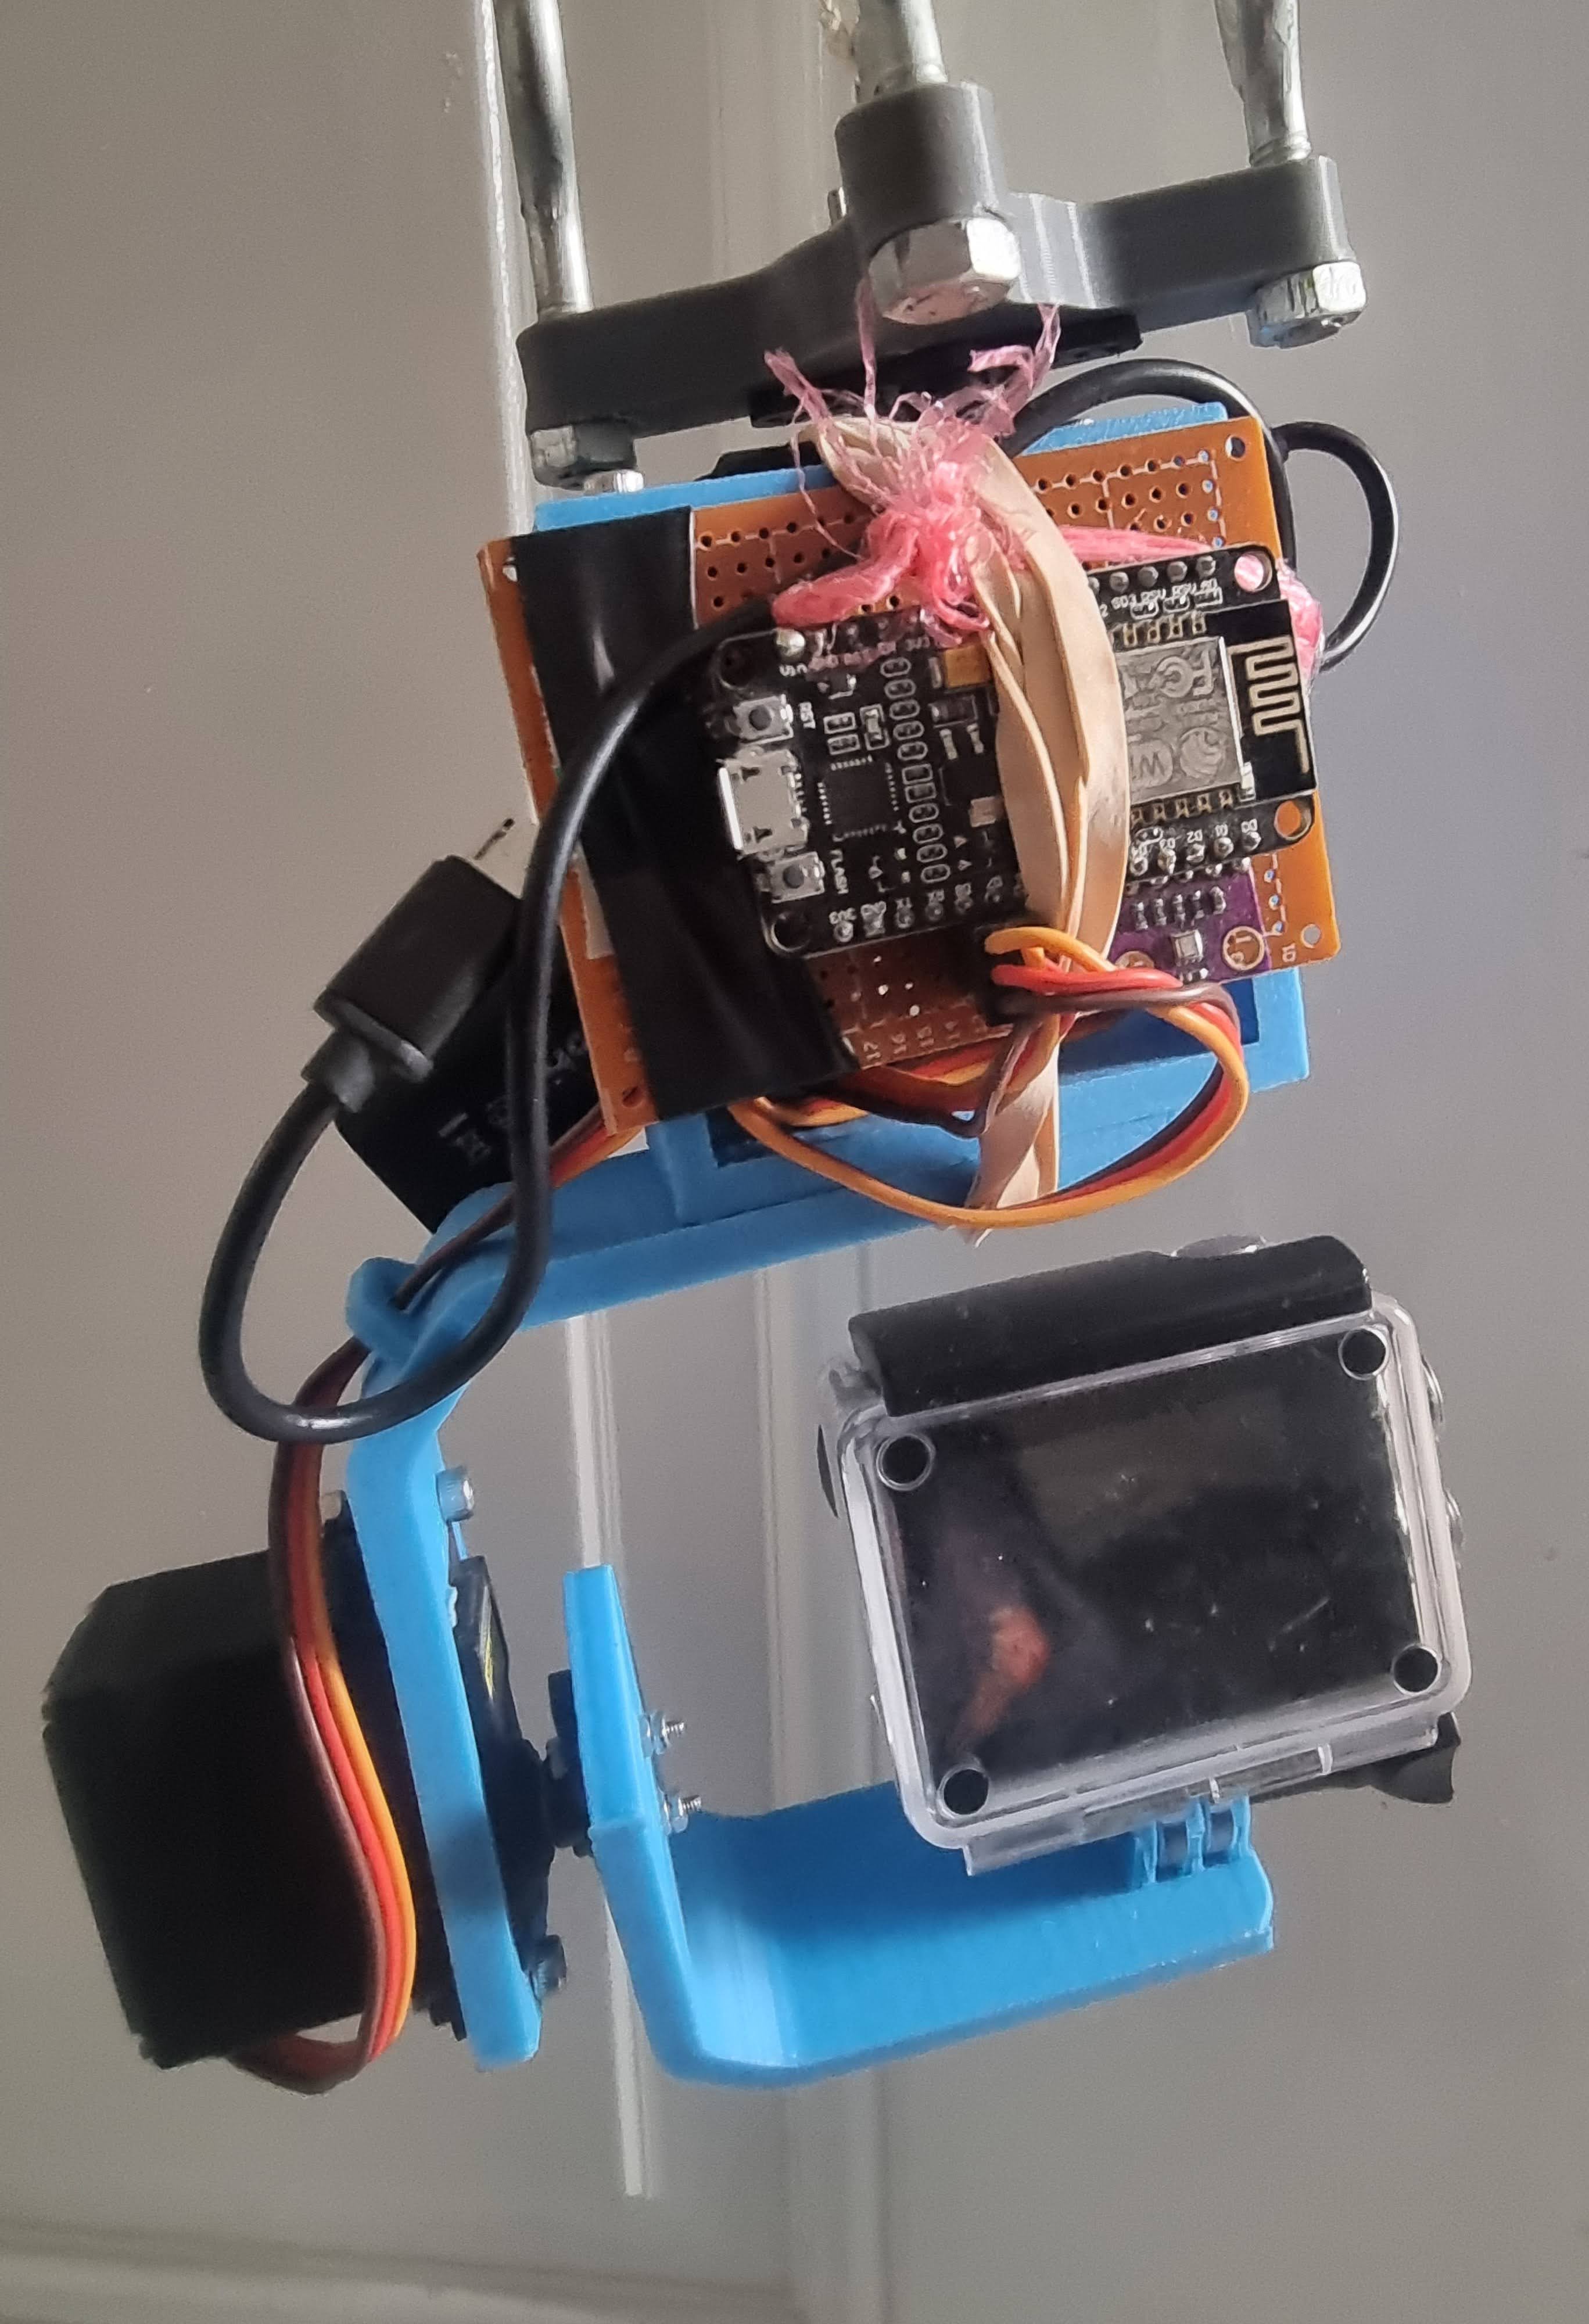
The camera has a WiFi function that allows you to connect to it with an app and see a preview/control capture etc, I used this WiFi hotspot to connect a microcontroller (ESP8266) to it and used servos to control the gimball (one continuous and one 180 degree one).
I am then able to control the gimball and see a preview/control capture at the same time, WiFi signal for the preview can be spotty if you let the camera out alot but normally standing right underneath it brings it back.
I normally just set the camera to take a photo every 3 seconds and move the gimbal about every now and then as the swaying from the wind can mean that some photos are no good (apparently increasing the size of my Picavet can mitigate that).
I also added a temp and humidity sensor to the board as I had it lying around and thought it might be interesting to see the the temperature up on the kite (I mostly forget its even there when controlling the gimbal)

I have ordered an ESP8266 with an OLED screen on the front as sometimes the camera changes the ESPs IP and I have no way of knowing it without plugging it into a PC.
The only real thing limiting me now from having better photos is the camera used, I could get something like a go pro up there, I was thinking maybe a refurbished older one, I might have to look into it.